- Featured
B2B Edition
Advanced B2B features for enterprise plans.Catalyst
NewCreate stunning, high-performing storefronts that captivate and convert.Feedonomics
Omnichannel feed and data transformation.Multi-Storefront
Manage multiple unique stores from one account.International
Grow your brand across the globe.

- Launch Services
Overview
Chart your path to success with specialised services.Implementation Project Management
Experts to ensure you launch on time and under budget.Solution Architecture
Seasoned advisors to help you best design your store.Data Migration & Optimisation
Expertise on a clean and clear path to migrating your data.Enterprise Launch Package
Personal training on how to set up and launch your BigCommerce Store.

Professional Services Blog Series
Get to know our teams and how they support your success in this Q&A series.

The Global B2B Buyer Behavior Report
This in-depth report provides actionable strategies to help you sell more online.
Ghost Mannequin Photography: A Step-by-Step Guide to Mastering the 3D Effect
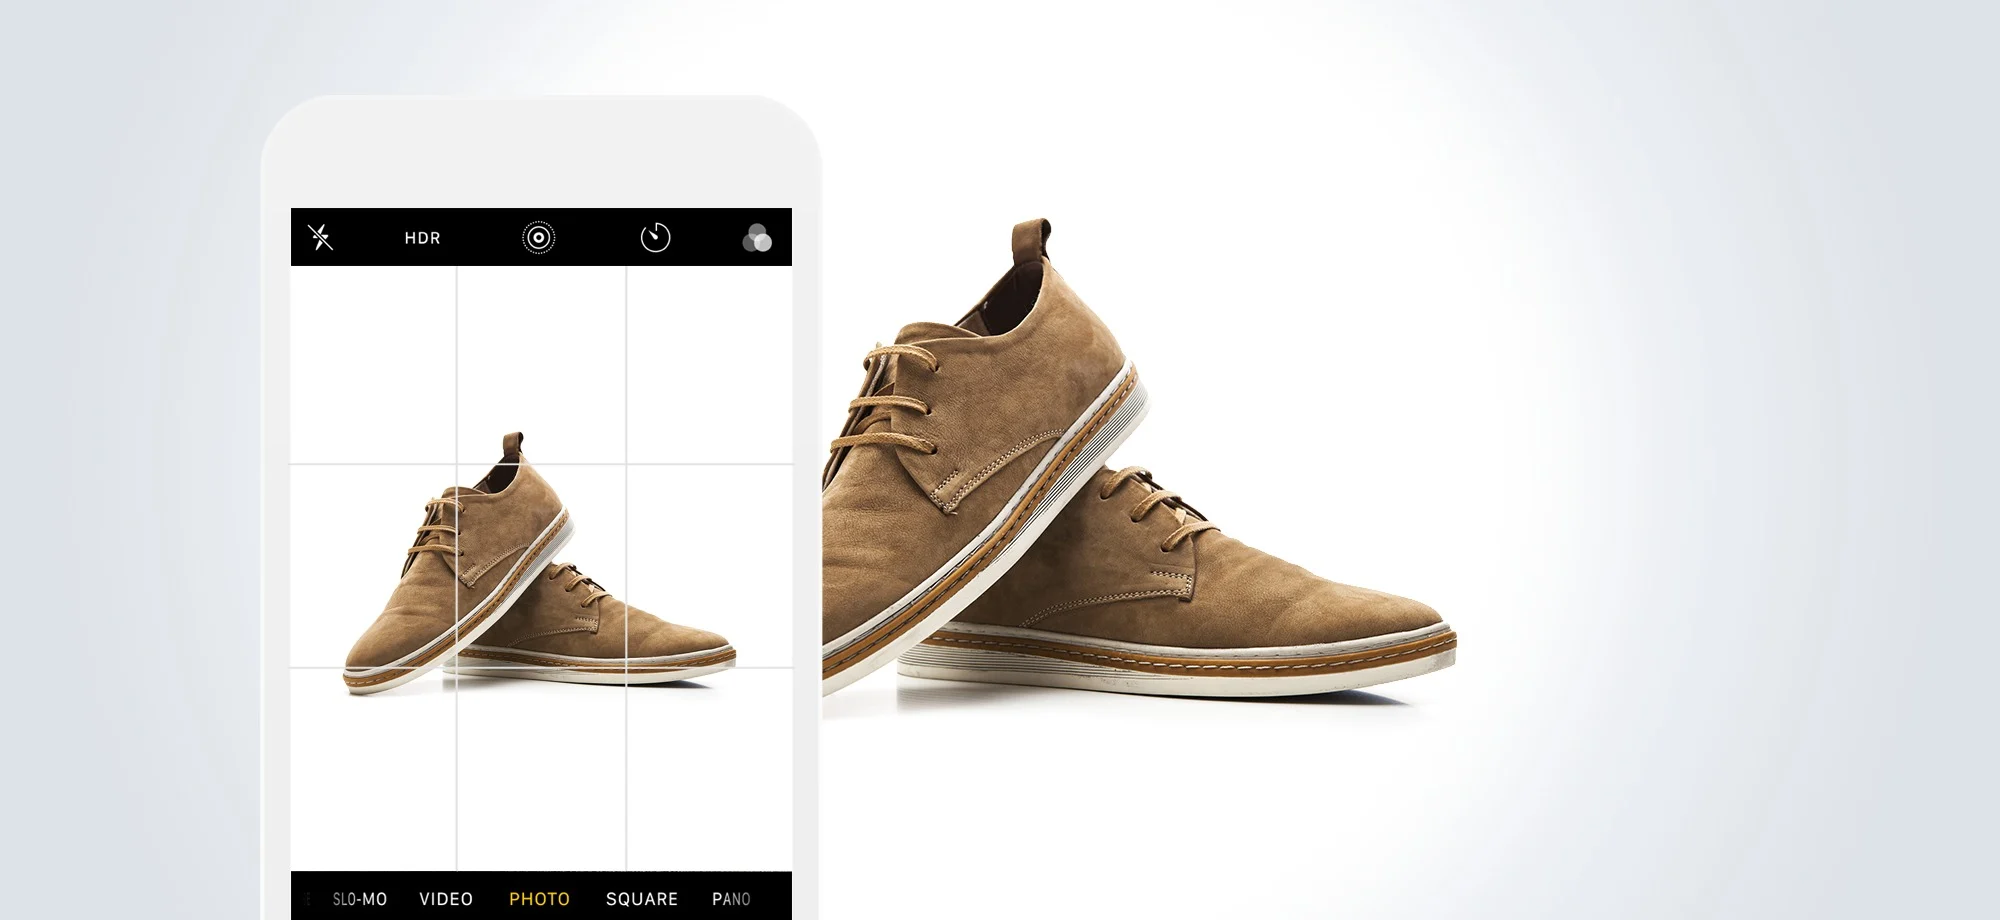
Using mannequins for your product images is an efficient and cost-effective way to promote your products.
Mannequins allow your products to hold their shape, which can make product images seem more professional and consistent — thereby increasing their desirability to customers.
However, mannequins can be distracting, so a great alternative is to create a ghost mannequin effect for your product images, like the ones below.

At first glance, this type of image may appear difficult to reproduce, especially for nonprofessional photographers. Like most challenges, it becomes achievable when you take each step one at a time.
In order to create the desired effect, we will follow a simple process that consists of combining two images of the product. It’s important to understand how you need to photograph your products in order to make the post-production process more effective.
Follow this simple start-to-finish guide and learn how to use post-production image editing to create a “ghost mannequin effect” for your ecommerce product photography.
How to Create the Ghost Mannequin Effect
1. Selecting and Posing a Model or Mannequin
One of the most common processes in fashion photography is to use models or mannequins to showcase the unique shape and fit of each product.
However, it isn’t always effective to actually show the model or mannequin in every image. Retailers sometimes opt to photograph their products being modeled and remove the models and make the mannequins seem invisible later in Photoshop.
For smaller retailers who do the majority of their image editing themselves, removing models and mannequins can be a difficult technique to master.
In order to create the “ghost mannequin” illusion (also known as “invisible mannequin”), you will need to first photograph your product being worn by a model or a mannequin from multiple angles. The plus side to this is that you will be able to use these images in your product galleries alongside any “ghost” images that you create.
Static pose, good for turning into ghost mannequin.
Live model movement image, not good for invisible mannequin.
If you decide to use a real model, make sure to use a static pose, as shown above.
Additionally, your model should be styled minimally, and long hair should be tied up so that it does not obstruct viewing of the product. These details will make image editing much easier.
There is a wide variety of mannequins you can choose.
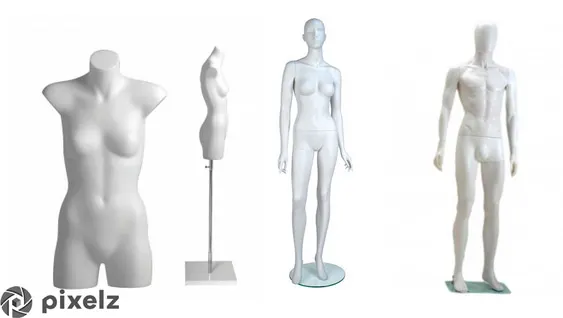
The best mannequins are lifelike and static, as shown above.
Depending on your needs, you may choose to purchase a mannequin with or without arms, hands, legs or neckline. If your mannequin does have arms and hands, then make sure that the limbs can be positioned out of the frame.
Pro Tip
White matte mannequins tend to be non-reflective and can be made to blend into white backgrounds, which will make editing the mannequin out of the image a much easier task.
Make sure that your product fits your mannequin or model by using the right size or styling the garment to fit correctly. Also, if your product has sleeves, make sure to position the sleeves downward so that the viewer can’t see down them.
2. Setup and Equipment
In order to execute the ghost mannequin technique, you need to be able to create high quality photographs in a studio setting.
The lower the quality of your photographs, the less appeal the ghost mannequin effect will be able to add to those images. Camera and lighting techniques, equipment, and placement all come into play here, depending on each particular product that you’re shooting.
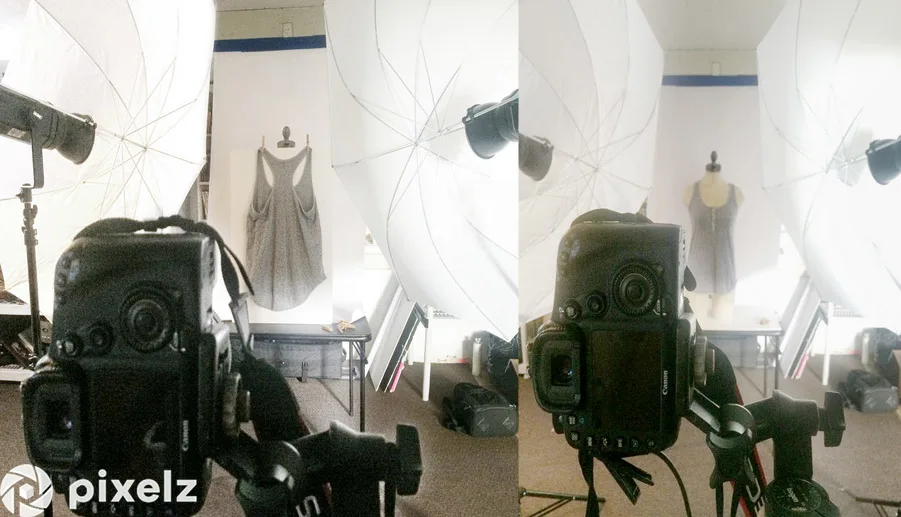
Both of these studio setups require two studio lights and umbrellas.
Set up your DSLR settings
Here’s exactly how to use your DSLR camera’s settings to capture great product images.
If you need inspiration, check out this professional demonstration of a ghost mannequin photoshoot by ecommerce photo studio Fotoempresas.
3. Photographing the Product
When photographing shirts, it’s important to position the camera to be directly level with the chest area, whereas the camera should be positioned across from the hip area to photograph bottoms.
Photographing a product from an angle that is either too high or too low may cause the garment to look “tapered” and inaccurate.
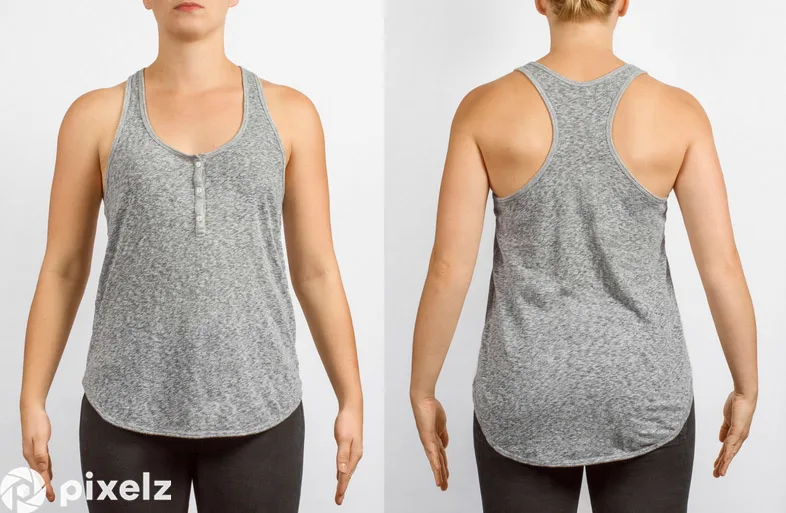
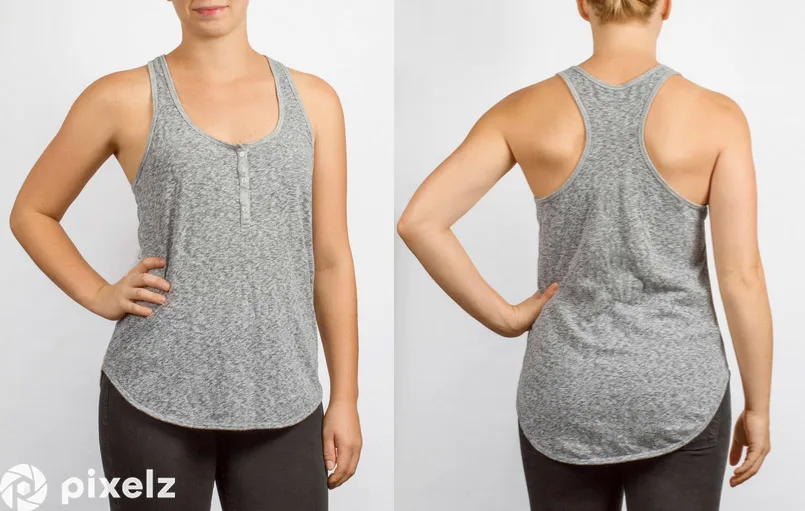
Below are two example photographs of a tank top being worn by a mannequin. The image on the left was taken below chest-height, resulting in an unappealing view of the product; the front and back image on the right was taken at chest-height, resulting in a flattering view of the product.
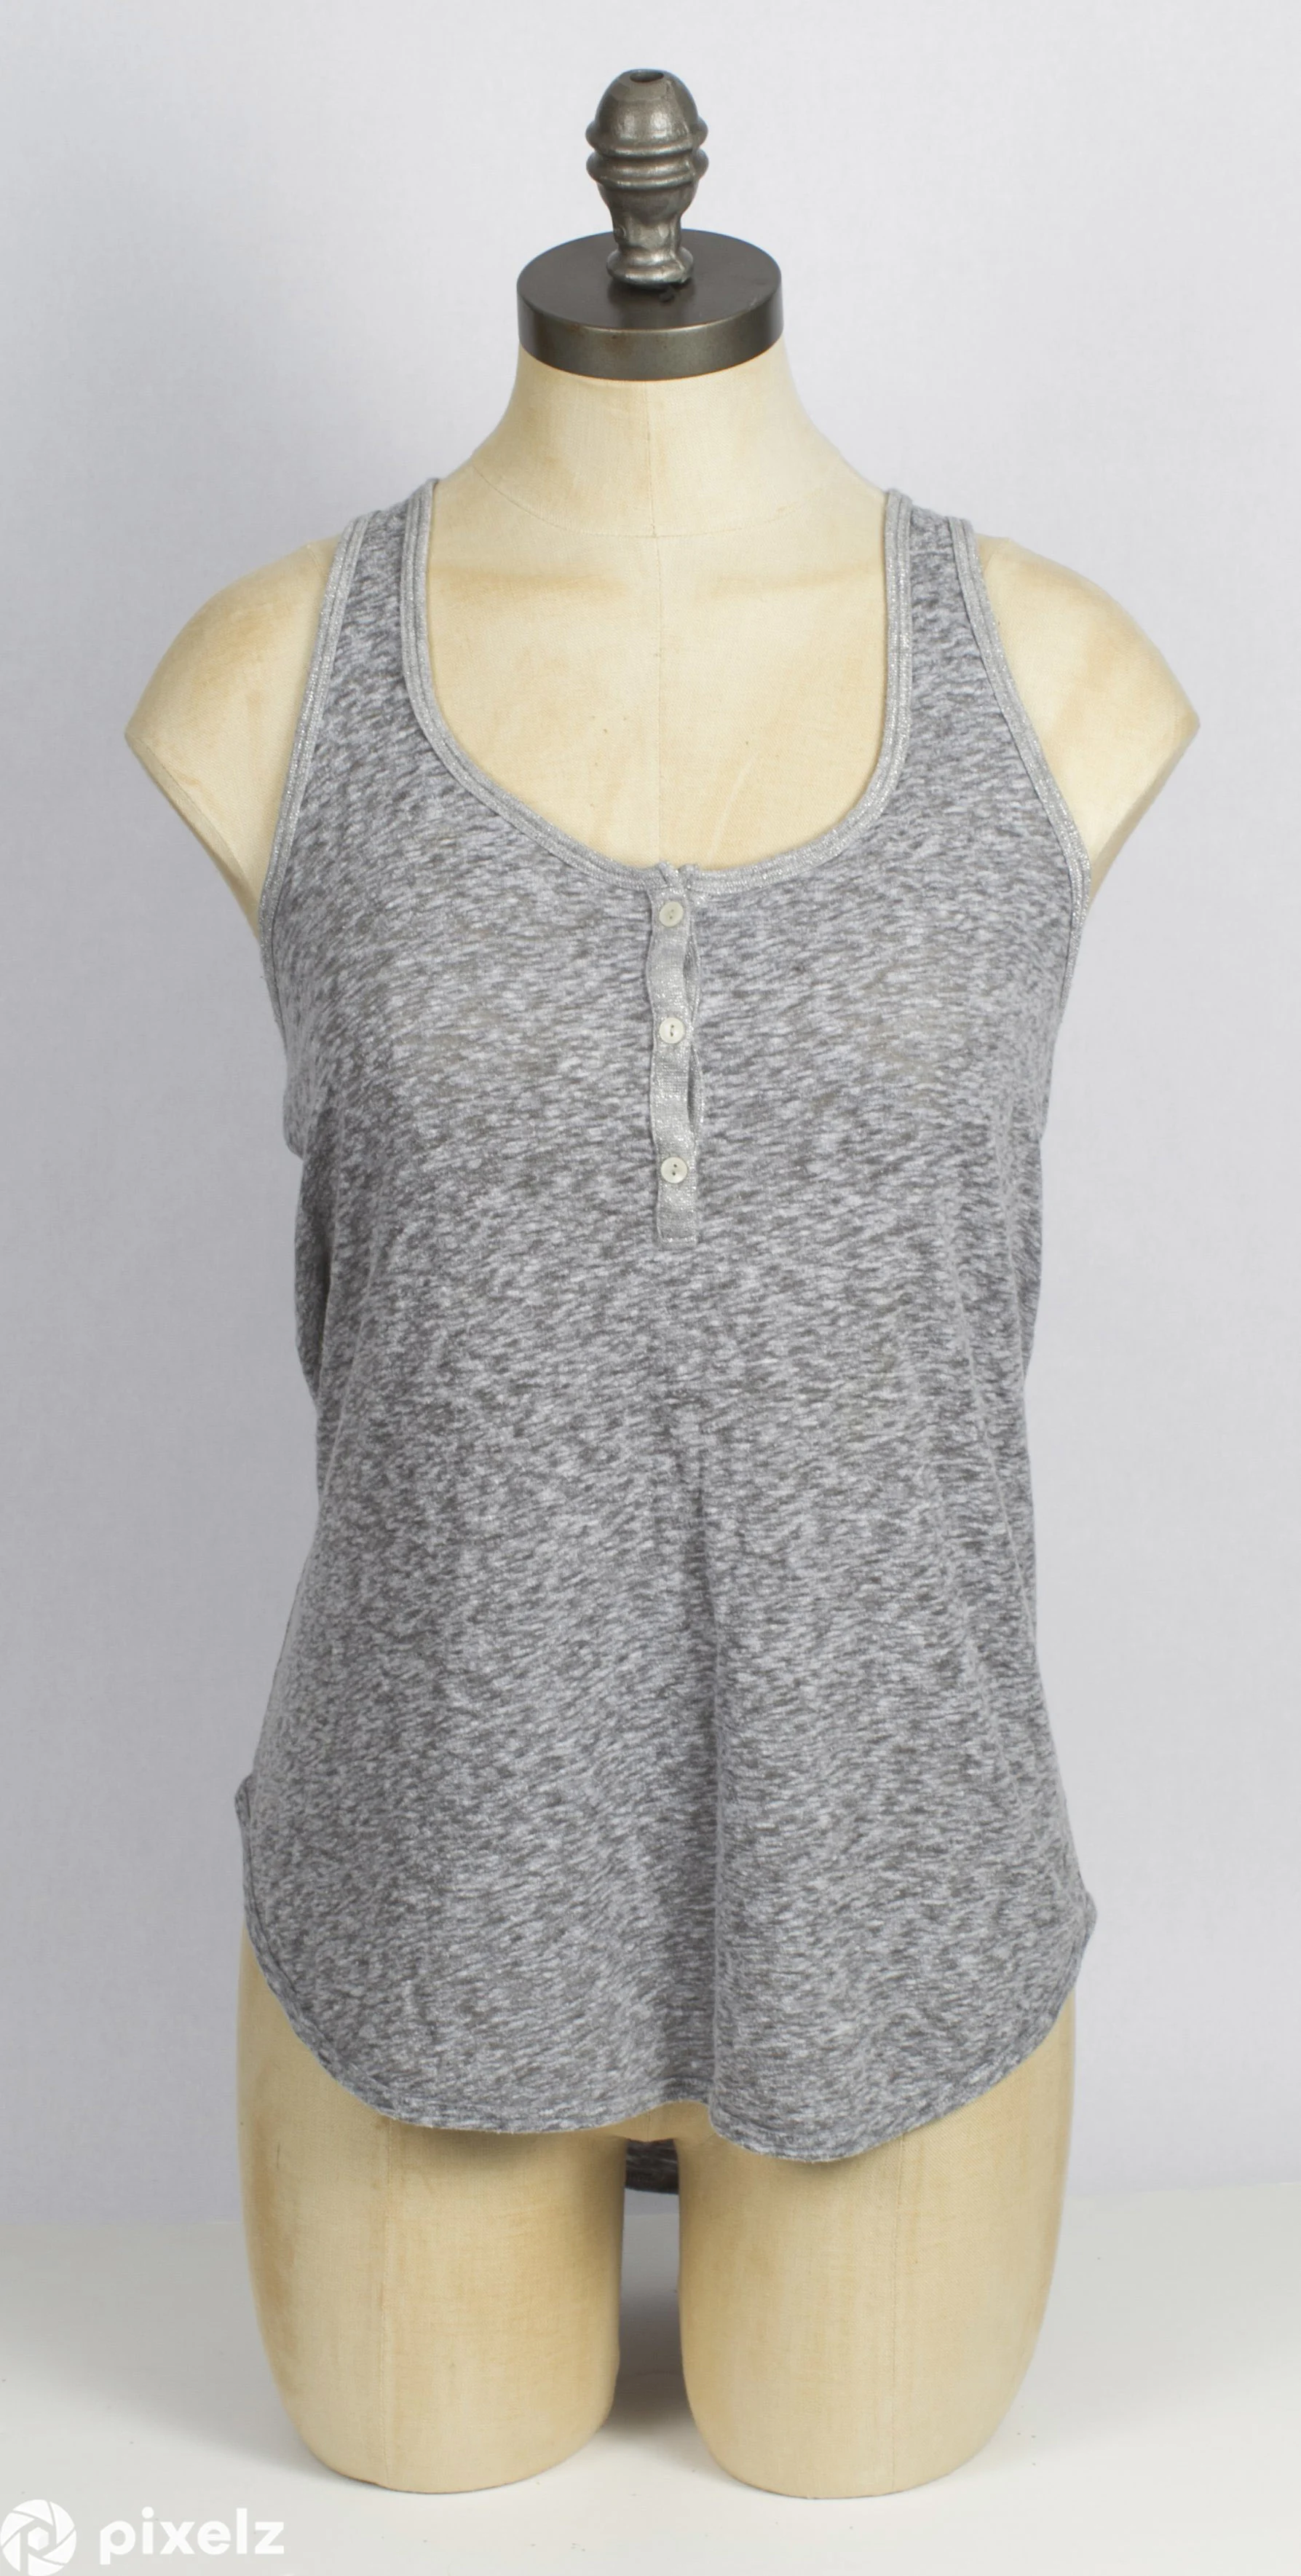
For the above photo, the camera was positioned lower than chest level, which flattens the appearance of the product.
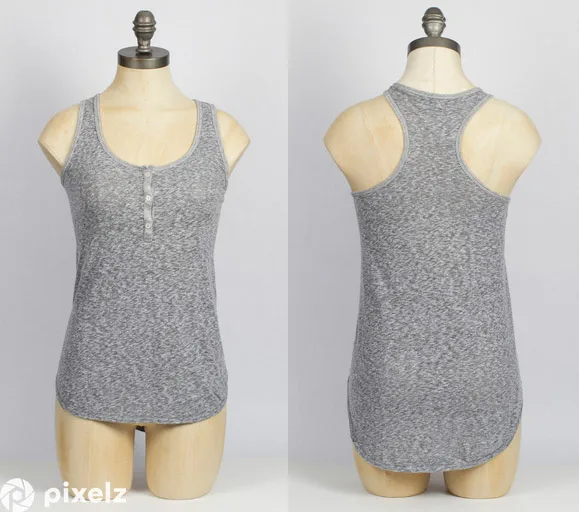
Shooting at chest-height provides an appealing view of the product.
Using a telephoto zoom lens to capture your images can help to minimize distortion and provide you with the flexibility to move closer to smaller objects and move farther away from larger objects.
Make sure that your studio shooting space is large enough to accommodate your camera and tripod for invisible mannequin shoots: two studio lights and umbrellas spaced evenly apart on either side of the product, and backdrop.
To create a 3D image with the ghost mannequin technique:
First capture a front and back view of your product being worn by your mannequin or model.
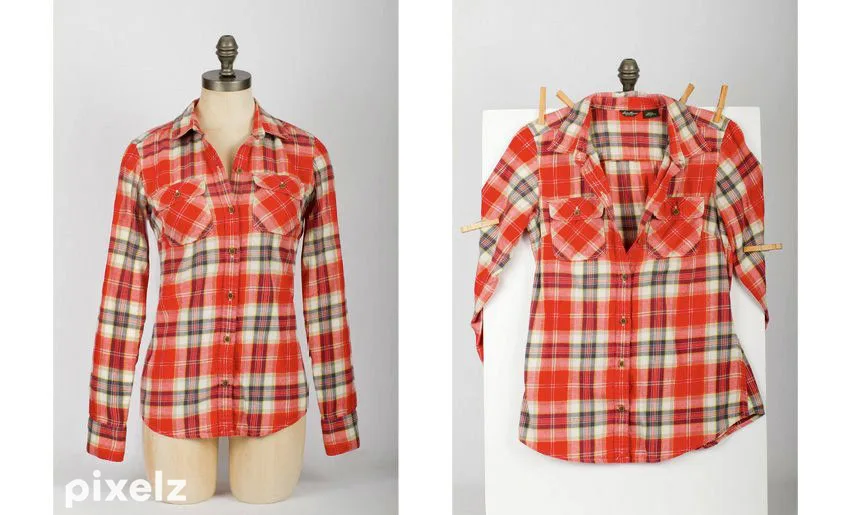
After that, style and hang your product on a piece of white foam board and photograph both the front and back views again; these foam board shots will allow you to include the inner areas of the garment once you combine the images together, as shown below.
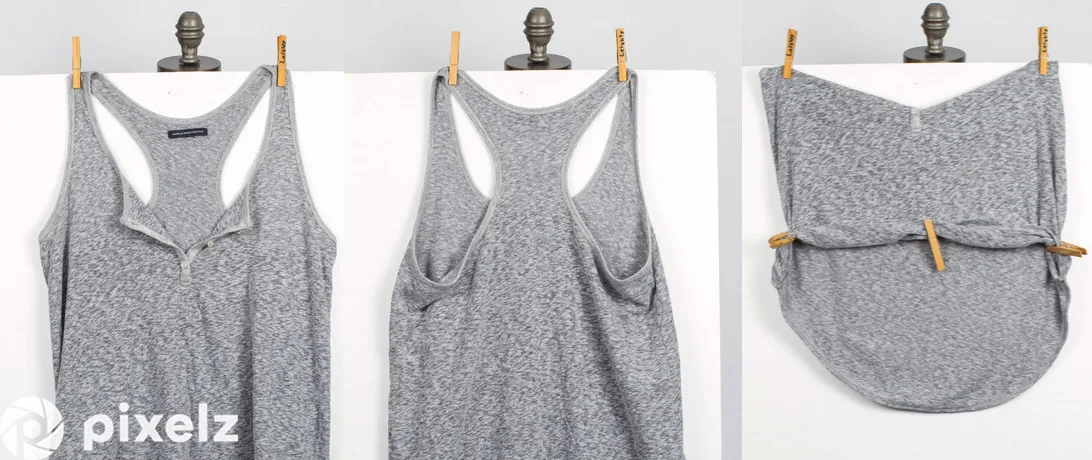
For collared shirts and similar products, make sure the top is open and the inner back is clearly visible. You may even want to turn it inside out in some instances.
Post-Processing Images: A Step-by-Step Guide
After you have captured the necessary views, creating a ghost mannequin effect is actually quite simple –– given that you own the proper post-production software (e.g. Adobe Photoshop) and that your products have been photographed correctly. You can also outsource this editing work to professional editors and get back your ghost mannequin images in 24 hours, ready to sell.
Outsourcing this work may save your company a great deal of time and frustration in the long run, but if budget constraints require you to make the edits yourself, follow these seven simple steps to create your own ghost mannequin effect in Photoshop.
1. Open Your Files in Photoshop and Create Layers
First, you will need to open the mannequin image and the foam board image in Photoshop. Select your mannequin image and create a new background layer.
Fill that layer in with white; it will serve as your overall background when you’re finished. It’s also helpful to label your layers so that you can tell them apart and remain organized.
2. Use a Selection Tool to Select the Product in the Mannequin Image
Now it’s time to select the product in your mannequin image. Zoom in tight and choose your favorite selection tool: quick selection, lasso or magic wand.
All three can help you to accomplish your desired selection.
Keep in mind that, in most cases, using a white background when shooting allows you to remove the mannequin easily because of the color separation between the product and the background.
3. Refine and Place Your Mask
Once you have selected the entire product, refine your mask so that it is nice and tight, removing all of the background and mannequin.
This can be accomplished using the “Refine Edge” tool in the “Select” menu.
Click “OK” in the “Refine Edge” dialogue box and place a mask on your shirt layer.
At this point, you should see your product floating freely on the white background that you created in the beginning.
If necessary, refine the mask slightly more and/or refine the product’s edges again to give it a nice, clean look.
4. Rinse and Repeat Previous Steps with the Foam Board Image
Now it’s time to switch gears and repeat Steps 1, 2 and 3 on your foam board product image.
This type of product image may seem a little odd at first, but having one to work with is important; photographing the product inside-out will allow you to show the inside back of the product, completing the mannequin illusion.
We promise that it will look great in the end!
Create a new layer, select out the product, and create and refine your mask.
5. Combine the Images
When both images contain tight, clean masks, drag the mask from your foam board image over to the image of your ghost mannequin product image.
Organize the layers so that the foam board image is lower than the mannequin image.
Then, adjust the positioning of the foam board layer and adjust its proportions so that it fits perfectly behind the mannequin layer, just below the shoulder in a rounded curve.
6. Remove Unnecessary Parts of the Foam Board Layer
At this point, it’s a good idea to hide your mannequin layer and brush out the unneeded parts of the foam board layer.
You really only need to keep that neckline triangle between the shoulders. In the video below, notice how the string across the back is showing as well.
It’s important to remember to remove that piece in the foam board image because it’s already in place in the mannequin shot.
Once you’ve done this, double check that your layers are clean and that nothing is out of alignment — especially in the neck and shoulder area.
7. Add Shadows and Save
Finally, add a shadow between the two layers to give the product some depth, and save a copy of the Photoshop file with all of the layers intact, just to be safe.
Once you’ve saved the layer file, flatten or merge all of the layers together and save the image again as a different file. This final step will make your image look professional and realistic.
If the editing job is done well, you will end up with an amazing 3D effect like the ones below that will improve your product photography and help you increase sales for your online store.
Want to see all seven steps in action? Watch the tutorial below for a step-by-step guide to the process.
As you can see, if you follow the steps, you can create your own professional apparel product images having the ghost mannequin effect. To see examples with all kinds of different apparel, you can download this complete guide to ghost mannequin product photography.
Remember that this effect on your product images will not only make your products look more attractive and unique, it will also bring the look of your online store to a highly professional level. You will elevate your brand in customers’ eyes, and that will elevate sales.

Thomas Kragelund is the CEO and founder of Pixelz, a leading product image solutions partner for internet retailers, bloggers, designers, photographers and webmasters worldwide. He has been working in ecommerce for the last 15 years. Sign up today and get 3 product images edited for free.